Knowing the common problems after engine replacement is of paramount importance. This helps shed light on the myriad challenges that can arise once the new powerplant is in place.
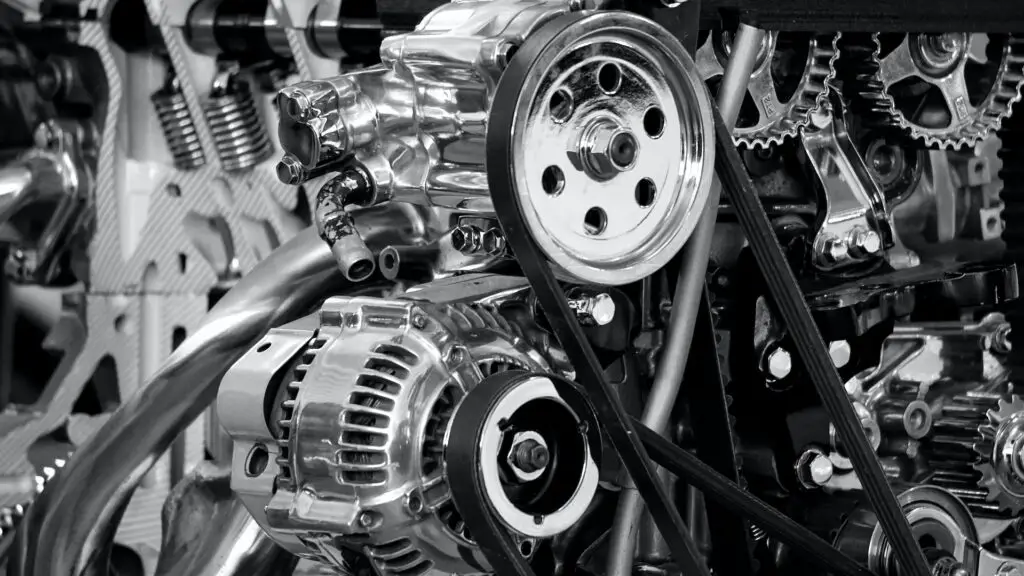
Undertaking an engine replacement is a substantial investment of time, resources, and effort. It is often necessitated by factors like engine wear, damage, or the desire for improved performance.
While the prospect of a rejuvenated vehicle is exciting, it’s important to acknowledge that the journey doesn’t end with the successful installation of a new engine. It’s just the beginning.
It’s important to note that common problems after engine replacement may arise. These issues encompass a broad spectrum, from the subtle nuances of engine performance and drivability to more glaring concerns like leaks, vibrations, or electrical malfunctions.
Vehicle owners and mechanics alike must familiarize themselves with these post-replacement challenges. This knowledge can mean the difference between a seamless transition to a revitalized engine and a cascade of frustrating setbacks.
In this comprehensive guide, we will delve into each of these common problems, dissecting their potential causes, and offering practical solutions.
Whether you’re a seasoned automotive professional or an enthusiast embarking on your first engine replacement project, understanding the intricacies of what lies ahead is crucial to ensure a successful and trouble-free journey with your newly replaced engine.
Let’s begin.
Table of Contents
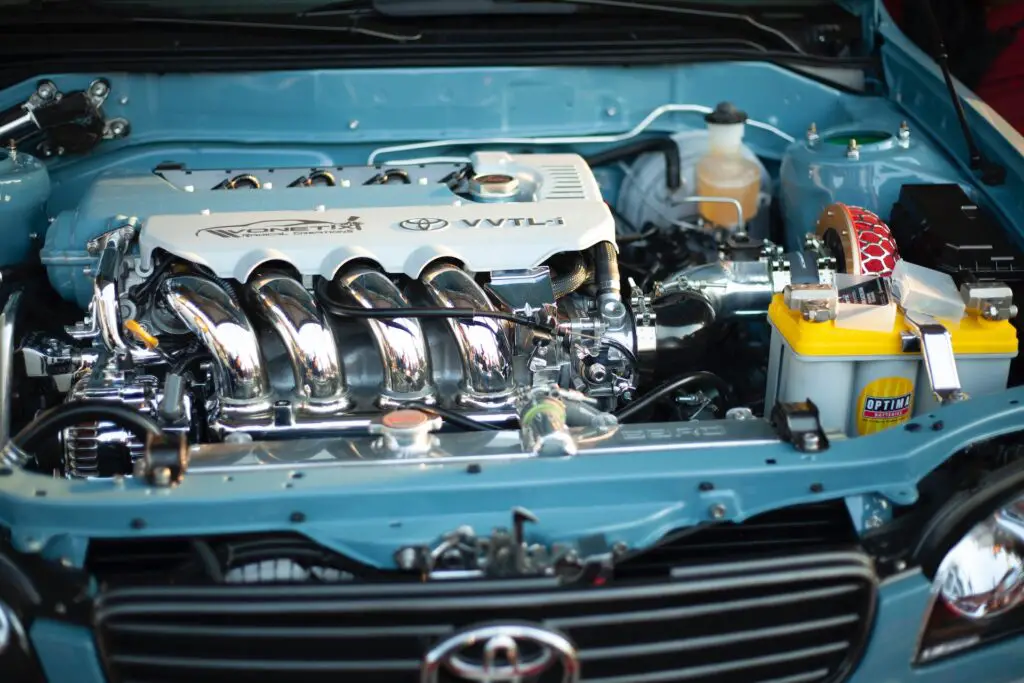
What Is Engine Replacement?
Engine replacement is a complex and significant automotive procedure involving the removal of a vehicle’s existing engine and its substitution with a new or rebuilt one. It is typically undertaken for several reasons, including engine wear, irreparable damage, or a desire for enhanced performance.
The process begins with the removal of the old engine, which includes disconnecting various components such as wiring, hoses, and exhaust systems. The replacement engine is then carefully installed, often necessitating the transfer of peripheral components from the old engine to the new one.
Once installed, the replacement engine undergoes meticulous testing and calibration to ensure proper functionality. Engine replacements can be performed by professional mechanics or skilled automotive enthusiasts and can breathe new life into a vehicle, extending its lifespan and improving its overall performance.
What are the Common Problems After Engine Replacement?
Exploring the aftermath of an engine replacement is essential to ensure a smooth transition to a revitalized powertrain. In this section, we will delve into the commonly encountered issues that arise once a new engine is in place.
Understanding these common problems after engine replacement is crucial for both vehicle owners and mechanics, as it empowers them to identify, diagnose, and effectively address post-replacement challenges, thereby ensuring the long-term success of the engine replacement project.
Poor Engine Performance
Poor engine performance is one of the common problems after engine replacement. After investing in a new or rebuilt engine, experiencing subpar performance can be disheartening.
Poor engine performance is one of the common problems after engine replacement for several reasons:
- Improper Installation: If the new engine is not installed correctly, it can lead to poor performance. This may include issues with engine mounts, exhaust system connections, or the alignment of various components.
- Incorrect Tuning: An improperly tuned engine can result in poor performance. If the engine control module (ECM) or electronic control unit (ECU) is not calibrated correctly, it can lead to issues like incorrect air-fuel mixture, ignition timing, or fuel delivery.
- Damaged Components: During the engine replacement process, various components can be damaged or improperly connected, leading to suboptimal performance. This could include sensors, wiring harnesses, or vacuum lines.
Possible Solutions
- Ensure Proper Installation: Ensure that the replacement engine is installed correctly, following manufacturer specifications and guidelines. Pay close attention to engine mounts, exhaust connections, and the alignment of components like the transmission.
- Verify Engine Tuning: Verify that the engine is properly tuned and calibrated. This may involve using a diagnostic tool or scanner to check for error codes and adjusting the ECM/ECU settings as needed. Consult the engine’s service manual or a professional mechanic for proper tuning procedures.
- Inspect and Repair Components: Thoroughly inspect all components and connections, including sensors, wiring, and vacuum lines. Replace any damaged parts or connectors. Ensure that all electrical connections are secure and correctly routed.
- Check for Vacuum Leaks: Vacuum leaks can cause poor engine performance. Use a smoke test or a can of carburetor cleaner to identify potential vacuum leaks and address them by replacing damaged hoses or gaskets.
- Inspect the Fuel System: Check the fuel system for any issues such as clogged fuel filters, malfunctioning fuel injectors, or inadequate fuel pressure. Address any fuel system problems to ensure the engine receives the proper amount of fuel.
- Inspect the Ignition System: Inspect the ignition system for problems like worn spark plugs, damaged ignition coils, or faulty ignition wires. Replace any components that show signs of wear or damage.
- Inspect the Exhaust System: Ensure that the exhaust system is properly connected and free from leaks. Leaks in the exhaust can lead to reduced engine performance and may trigger the Check Engine Light.
- Check the Air Intake System: Check the air intake system for restrictions or blockages. Make sure the air filter is clean, and there are no obstructions in the air ducts.
Note
If this problem persists despite these checks and solutions, it’s advisable to consult a professional mechanic or automotive technician for proper diagnostics and tuning. They can perform more in-depth tests and adjustments to identify and address the specific issues affecting engine performance.
Check Engine Light (CEL) Illumination
The illumination of the Check Engine Light (CEL) is part of the common problems after engine replacement. This indicator, while small in appearance, can signify a range of potential problems within the vehicle’s complex system.
The Check Engine Light (CEL) coming on as one of the common problems after engine replacement can be attributed to several factors, including:
- Malfunctioning Sensors: Engine sensors, such as the oxygen sensor (O2 sensor), mass airflow sensor (MAF sensor), or crankshaft position sensor, may become damaged during the engine replacement process or may not have been properly reconnected.
- Incomplete Reassembly: If some components, connectors, or wires were not properly reassembled or connected during the engine replacement, it can trigger the CEL.
- Electrical Issues: Wiring harnesses, connectors, or electrical components may have been disturbed or damaged during the engine replacement, leading to electrical faults that trigger the CEL.
- Unresolved Pre-existing Issues: In some cases, pre-existing issues in the vehicle’s electrical system or engine management system may have been present before the engine replacement but were not addressed, and they can trigger the CEL.
Possible Solutions
- Retrieve Diagnostic Trouble Codes (DTCs): The first step in addressing a CEL is to use an OBD-II (On-Board Diagnostics) scanner to retrieve diagnostic trouble codes (DTCs). These codes provide specific information about the issue triggering the CEL. Note down the codes for reference.
- Inspect Sensor Connections: Check all sensor connections, wiring harnesses, and connectors related to engine sensors. Ensure they are properly connected, secure, and undamaged. Reconnect or replace any damaged components as necessary.
- Check for Loose or Damaged Components: Thoroughly inspect the engine bay and surrounding areas for any loose or damaged components, wires, or connectors. Secure or repair any issues found.
- Clear DTCs: After addressing any obvious issues, use the OBD-II scanner to clear the stored DTCs. This will reset the CEL. If the issue was a one-time occurrence or has been successfully resolved, the light may stay off.
- Road Test: Take the vehicle for a road test to confirm that the CEL does not illuminate during normal driving conditions. Monitor the dashboard for any signs of the CEL returning.
- Consult a Professional: If the CEL continues to illuminate or reoccurs shortly after being cleared, it’s advisable to consult a professional mechanic or automotive technician. They can perform a more comprehensive diagnostic scan and pinpoint the exact cause of the issue using specialized diagnostic equipment.
- Address Pre-existing Issues: If the CEL is related to pre-existing issues in the vehicle’s electrical or engine management system, it’s essential to address these problems as well. A professional mechanic can help diagnose and repair these underlying issues to prevent the CEL from reoccurring.
Note
It’s crucial to address a Check Engine Light promptly, as it often indicates a problem with the vehicle’s engine or emissions system. Ignoring the CEL can lead to reduced fuel efficiency, increased emissions, and potential damage to the engine or catalytic converter over time.
Oil Leaks
The emergence of oil leaks is a persistent and often vexing issue that vehicle owners and mechanics encounter following an engine replacement. These leaks, though seemingly minor, can lead to significant repercussions if left unaddressed.
Oil leaks can occur as one of the common problems after engine replacement for several reasons, often related to improper installation or damaged components:
- Gasket or Seal Issues: The most common cause of oil leaks is improper sealing, which can happen if gaskets, seals, or O-rings are not installed correctly during the engine replacement. These components can become damaged or misaligned during installation, leading to leaks.
- Faulty Gaskets or Seals: If low-quality gaskets or seals were used during the replacement, they may not provide a proper seal, leading to oil leaks. Additionally, old or worn-out gaskets and seals on other engine components can also contribute to leaks.
- Loose or Overtightened Bolts: Bolts securing various engine components, such as the oil pan or valve covers, must be tightened to the manufacturer’s specifications. Over-tightening or under-tightening can compromise the seal and lead to oil leaks.
- Damaged Oil Pan: The oil pan itself can be damaged during the engine replacement process, resulting in leaks. This damage can occur if the oil pan comes into contact with other components or if it is mishandled.

Possible Solutions
- Inspect Gaskets and Seals: Carefully inspect all gaskets, seals, and O-rings associated with the engine components, such as the oil pan, valve covers, and oil filter housing. Ensure they are properly aligned, undamaged, and correctly seated.
- Replace Faulty Gaskets and Seals: If you discover damaged or low-quality gaskets or seals, replace them with high-quality, OEM (original equipment manufacturer) or equivalent parts. Ensure that the new gaskets and seals are installed correctly.
- Proper Torque: Verify that all bolts and fasteners, especially those securing components like the oil pan and valve covers, are tightened to the manufacturer’s specified torque settings. Over-tightening can crush gaskets, while under-tightening can lead to leaks.
- Inspect the Oil Pan: Examine the oil pan for any signs of damage, such as cracks or dents. If the oil pan is compromised, it should be replaced to prevent further leaks. Be sure to install the new oil pan properly with a new gasket.
- Clean the Engine: Thoroughly clean the engine and surrounding areas to remove any oil residue. This will help you identify the source of the leak more easily and allow you to monitor for new leaks after addressing the issue.
- Monitor for Leaks: After addressing potential leak sources, monitor the engine for any signs of new oil leaks. Run the engine and visually inspect the area around the suspected leak points. If leaks persist, further investigation is necessary.
- Professional Inspection: If you are unable to locate or resolve the oil leak, or if it persists despite your efforts, it’s advisable to consult a professional mechanic. They can use specialized tools and experience to diagnose and repair the issue accurately.
Note
Addressing oil leaks promptly is crucial to prevent engine damage and maintain proper oil levels. Ignoring oil leaks can lead to reduced engine performance, overheating, and even catastrophic engine failure over time.
Overheating Issues
Overheating issues can be frustrating and potentially damaging. It’s one of the common problems after engine replacement. While a new or rebuilt engine is expected to run smoothly, issues with overheating can disrupt the vehicle’s performance and even lead to severe engine damage if left unattended.
Experiencing overheating problems after an engine replacement can be caused by various factors, including:
- Air Pockets in the Cooling System: During the engine replacement process, air pockets can become trapped in the cooling system, preventing proper coolant circulation and leading to overheating.
- Faulty Thermostat: A malfunctioning thermostat may not open and close as it should, affecting the flow of coolant through the engine and radiator.
- Damaged Water Pump: Damage to the water pump or its impeller can result in reduced coolant circulation, leading to inadequate cooling.
- Clogged Radiator: If the radiator is clogged with debris or scale buildup, it can obstruct coolant flow and cause overheating.
Possible Solutions
- Bleed the Cooling System: To remove air pockets from the cooling system, follow these steps:
- Ensure the engine is cool.
- Remove the radiator cap.
- Start the engine and let it idle while monitoring the coolant level.
- As the engine warms up, you may notice air bubbles escaping. Continue to add coolant as needed until the level stabilizes.
- Close the radiator cap and check for any additional leaks or air pockets.
- Thermostat Inspection and Replacement: Test the thermostat to ensure it opens and closes at the correct temperature. If it’s faulty, replace it with a new one. Proper thermostat function is essential for regulating engine temperature.
- Water Pump Inspection: Examine the water pump for signs of damage or impeller issues. If you find any problems, replace the water pump with a new one. Ensure all connections to the water pump are secure.
- Radiator Cleaning or Replacement: If the radiator is clogged, it may need to be cleaned or replaced, depending on the extent of the blockage. Flushing the cooling system can help remove debris, but severe clogs may require radiator replacement.
- Coolant Level Check: Ensure the coolant level is at the correct level in both the radiator and the coolant reservoir. Top off the coolant as needed with the appropriate coolant mixture.
- Cooling Fans and Sensors: Inspect the cooling fans and associated sensors. Ensure that the fans are functioning correctly and that the sensors are sending the right signals to engage the fans when needed.
- Inspect Belts and Hoses: Check the condition of the drive belts and coolant hoses. Worn or damaged belts can affect the operation of the water pump, while cracked or leaking hoses can lead to coolant loss. Replace any damaged components.
More Solutions
- Pressure Test the Cooling System: Perform a pressure test to identify any external coolant leaks in the system. Fix any leaks found during the test.
- Verify Proper Engine Temperature: Use an infrared thermometer or a temperature gauge to verify that the engine is reaching the correct operating temperature. If the engine is not warming up sufficiently, it may indicate a faulty thermostat or temperature sensor.
- Professional Inspection: If the overheating issue persists or is challenging to diagnose, consult a professional mechanic. They can perform more advanced tests and use specialized equipment to identify and resolve the problem.
Note
Overheating can cause significant engine damage if left unaddressed, so it’s crucial to investigate and resolve the issue promptly after an engine replacement to ensure the engine runs at the proper temperature and remains in good condition.
Unusual Noises
Unusual noises can be disconcerting and disruptive. It’s one of the common problems after engine replacement. It affects both the vehicle’s performance and the driver’s peace of mind. Following the installation of a new or rebuilt engine, unexpected sounds can be indicative of underlying issues that demand attention.
Unusual noises emanating from the engine or surrounding components as one of the common problems after engine replacement can be caused by various factors, including:
- Loose or Misaligned Components: During the engine replacement process, components such as exhaust parts, belts, pulleys, or engine mounts may not be properly aligned or tightened.
- Damaged or Worn Components: The installation process or engine replacement itself may lead to damage to or accelerated wear of certain components, such as belts, pulleys, or engine mounts.
- Improper Lubrication: Components that require lubrication, such as bearings or moving parts, may not have been properly lubricated during installation, leading to noise issues.
- Exhaust System Issues: Incorrect alignment or loose connections in the exhaust system, including the exhaust manifold or catalytic converter, can cause unusual noises.

Possible Solutions
- Visual Inspection: Begin by conducting a visual inspection of the engine bay and surrounding components. Look for any loose or visibly damaged parts, including belts, pulleys, engine mounts, and exhaust components.
- Tighten and Align Components: If you identify loose or misaligned components, use the appropriate tools to tighten or realign them to the manufacturer’s specifications. Pay special attention to belts and pulleys, which can create noise when loose.
- Inspect and Replace Worn Components: If you find worn or damaged components during the visual inspection, such as damaged belts or pulleys, replace them with new parts. Ensure that replacement parts are of high quality and compatible with your vehicle.
- Proper Lubrication: Check components that require lubrication, such as bearings and moving parts, to ensure they are adequately lubricated. Apply the appropriate lubricant as recommended in the vehicle’s service manual.
- Exhaust System Inspection: Inspect the exhaust system, including the exhaust manifold and catalytic converter, for any misalignment or loose connections. Tighten or adjust components as needed.
- Engine Mount Inspection: Check the engine mounts for damage or wear. If you notice issues with the engine mounts, they may need to be replaced. Damaged engine mounts can lead to excessive engine vibration and noise.
- Run the Engine: Start the engine and listen carefully to the noise. Pay attention to when the noise occurs (e.g., during acceleration, idle, or deceleration). This information can help diagnose the source of the noise.
- Professional Inspection: If the unusual noise persists or if you are unable to identify its source, it’s advisable to consult a professional mechanic or automotive technician. They can use specialized diagnostic tools and their expertise to pinpoint the problem accurately.
Note
Addressing unusual noises promptly is essential, as they can be indicators of underlying issues that, if left unattended, may lead to further damage or decreased vehicle performance.
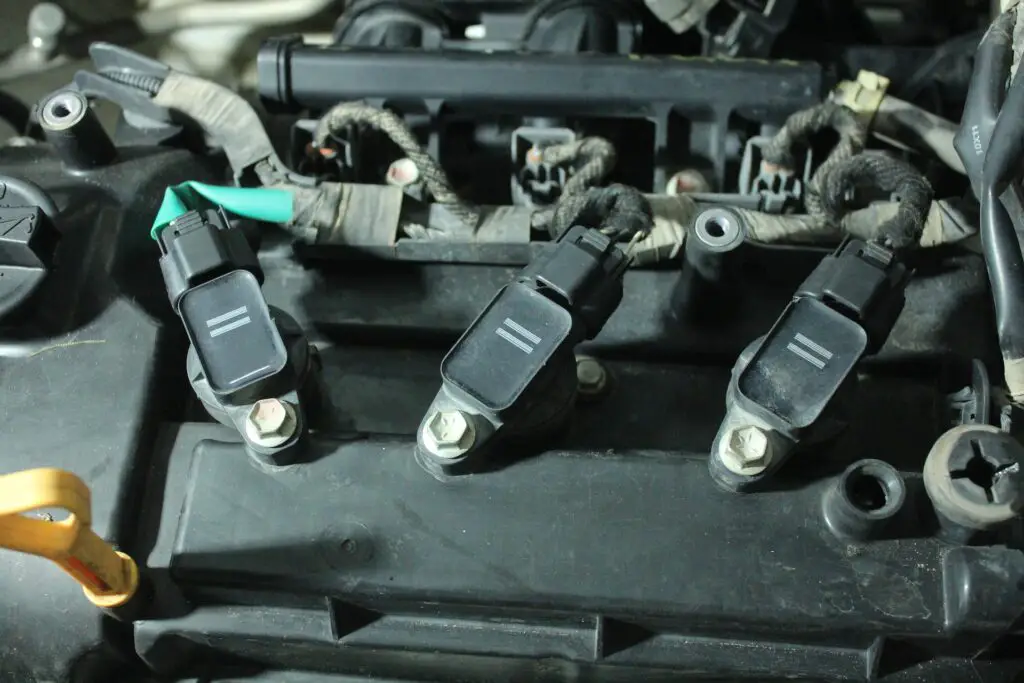
Electrical Issues
Electrical issues after engine replacement can be both confounding and frustrating, given the intricate web of electronic components that modern vehicles rely on for optimal performance. Post-engine replacement, electrical problems can manifest in various forms, from warning lights and sensor malfunctions to erratic behavior and power interruptions.
Experiencing electrical issues as one of the common problems after engine replacement can be attributed to various factors, including:
- Damaged Wiring or Connectors: During the engine replacement process, wiring harnesses, connectors, or electrical components may become damaged or disconnected accidentally.
- Incomplete Reassembly: If not all electrical connections were properly reassembled during the engine replacement, it can lead to electrical faults.
- Faulty Sensors or Components: Sensors, such as the crankshaft position sensor or camshaft position sensor, may be damaged or improperly installed during the replacement.
- Battery Disconnection: Disconnecting the vehicle’s battery during engine replacement can sometimes lead to electrical issues, especially if the reconnection process is not carried out correctly.
- Faulty Ground Connections: Insufficient or improper grounding of electrical components can cause electrical problems, including erratic sensor readings and malfunctions.
Possible Solutions
- Inspect Wiring and Connectors: Conduct a visual inspection of the engine bay and surrounding areas to check for damaged or disconnected wiring harnesses, connectors, or electrical components. Reconnect any disconnected components and repair or replace damaged wiring.
- Check Sensor Connections: Pay special attention to the connections of critical sensors like the crankshaft position sensor and camshaft position sensor. Ensure they are securely attached and correctly oriented.
- Battery Reconnection: If the battery was disconnected, reconnect it properly, ensuring the positive (+) and negative (-) terminals are connected securely. Reconnect any additional power sources or ground cables as needed.
- Scan for Error Codes: Use an OBD-II scanner to retrieve diagnostic trouble codes (DTCs). These codes can provide specific information about electrical issues. Address the issues indicated by the DTCs by repairing or replacing the affected components.
- Check Fuses and Relays: Inspect the vehicle’s fuse box for blown fuses or malfunctioning relays related to electrical systems. Replace any damaged fuses or relays with the correct replacements.
- Grounding Inspection: Verify that all electrical components are properly grounded. Clean and tighten ground connections to ensure good electrical contact.
- Voltage and Resistance Testing: Use a multimeter to perform voltage and resistance tests on electrical circuits and components. This can help identify issues such as short circuits or open circuits.
- Reset the Computer: If necessary, reset the vehicle’s computer system (ECM or ECU) by disconnecting the battery for a few minutes. Reconnect the battery, start the engine, and allow it to idle for a few minutes to relearn its operating parameters.
- Professional Inspection: If the electrical issues persist or are challenging to diagnose and resolve, consult a professional mechanic or automotive technician. They have the expertise and specialized diagnostic tools to pinpoint and fix complex electrical problems accurately.
Note
It’s essential to address electrical issues promptly after an engine replacement, as they can affect the vehicle’s performance, safety, and overall functionality. Proper electrical system diagnosis and repairs are crucial to ensure the vehicle operates correctly.
Excessive Exhaust Smoke
Excessive exhaust smoke is a notable and concerning issue that can arise after an engine replacement, often catching vehicle owners and mechanics by surprise. Following the installation of a new or rebuilt engine, the sight of unusual exhaust smoke—whether white, blue, black, or gray—can raise alarms.
Experiencing excessive exhaust smoke as one of the common problems after engine replacement can be attributed to various factors, depending on the color of the smoke:
White Smoke
White smoke is often associated with coolant entering the combustion chamber, indicating a potential issue with the engine’s cooling system.
Possible Solutions
- Check for coolant leaks in the engine, cylinder head gasket, or intake manifold gasket. If coolant is leaking into the combustion chamber, it may require gasket replacement.
- Inspect the radiator for leaks or a faulty radiator cap that may be releasing excess pressure.
- Ensure that the engine has been properly bled to remove any air pockets in the cooling system.

Blue Smoke
Blue smoke typically indicates the burning of engine oil, suggesting an oil-related issue.
Possible Solutions
- Check for oil leaks in the engine, valve seals, or piston rings. Address any leaks or worn components.
- Ensure the engine’s PCV (Positive Crankcase Ventilation) system is functioning correctly. A malfunctioning PCV system can lead to oil consumption.
- Verify that the engine oil level is within the recommended range and not overfilled.
Black Smoke
Black smoke is often a sign of excessive fuel combustion or a rich fuel-air mixture.
Possible Solutions
- Inspect the fuel injectors for clogs or malfunctioning injectors that may be delivering too much fuel.
- Check the air filter for clogs or restrictions that may be causing poor air intake.
- Verify the fuel pressure regulator is functioning correctly, as a faulty regulator can result in excessive fuel delivery.
Gray Smoke
Gray smoke can be a result of incomplete combustion or a problem with the turbocharger if your vehicle is turbocharged.
Possible Solutions
- Inspect the turbocharger for issues such as damaged seals or excessive wear.
- Check for clogged or restricted air or exhaust passages related to the turbocharger.
- Ensure proper fuel and air mixture and ignition timing.
General Tips
- Allow Break-In Period: After an engine replacement, it’s important to allow a break-in period as recommended by the engine manufacturer or the mechanic who performed the replacement. During this period, it’s common for some smoke to be emitted as the engine settles in.
- Monitor Oil and Coolant Levels: Regularly check the engine’s oil and coolant levels to ensure they are within the specified ranges. Address any significant changes promptly.
- Professional Inspection: If excessive exhaust smoke persists or you are uncertain about the cause, consult a professional mechanic or automotive technician. They can perform more detailed diagnostics to pinpoint the issue and provide the necessary repairs or adjustments.
Excessive exhaust smoke can be an indication of underlying problems, and addressing the issue promptly is crucial to maintain engine performance and prevent further damage.
Transmission Problems
Transmission Problems can be an unexpected and frustrating complication that surfaces after an engine replacement, significantly affecting a vehicle’s drivability and overall performance. Following the installation of a new or rebuilt engine, issues related to the transmission, whether they manifest as shifting problems, unusual noises, or erratic behavior, can leave vehicle owners and mechanics perplexed.
Experiencing transmission issues as one of the common problems after engine replacement can occur due to various reasons, some of which include:
- Misalignment or Misconnection: During the engine replacement process, components related to the transmission, such as the torque converter, transmission lines, or shifter linkage, may not have been properly aligned or connected.
- Damaged Components: The installation process or engine replacement itself can lead to damage or wear in transmission components, including the clutch, torque converter, or transmission fluid lines.
- Fluid Contamination: If there is any contamination of the transmission fluid during the engine replacement (e.g., debris or foreign substances entering the transmission), it can affect transmission performance.
- Electronic Control Issues: Modern vehicles rely on electronic control systems to manage transmission functions. Any damage to or improper connection of transmission-related sensors or wiring can lead to electronic control problems.
Possible Solutions
- Transmission Fluid Inspection: Check the transmission fluid level, color, and smell. The fluid should be at the correct level and appear clean and red. If it’s low or discolored, consider a fluid change and filter replacement. Contaminated fluid may require a full flush.
- Transmission Fluid Exchange: Perform a complete transmission fluid exchange or flush if there are signs of contamination or if you suspect that foreign substances entered the transmission during the engine replacement.
- Check Transmission Lines: Inspect the transmission fluid lines and connections to ensure they are properly aligned, securely connected, and free from damage. Replace any damaged lines or fittings.
- Shifter Linkage Inspection: Verify that the shifter linkage is correctly aligned and adjusted. Misalignment can result in difficulties shifting gears or engaging the transmission.
- Electronic Control Diagnostics: Use an OBD-II scanner to check for diagnostic trouble codes (DTCs) related to the transmission. If DTCs are present, follow the diagnostic procedures outlined in the service manual to address the specific issue.
- Torque Converter Inspection: If you suspect problems with the torque converter, perform a torque converter stall test. This test can help identify issues with the torque converter’s lock-up clutch.
- Transmission Mounts and Engine Alignment: Ensure that the transmission mounts are in good condition and properly aligned. Misaligned mounts can lead to vibrations and transmission issues.
- Professional Inspection: If transmission problems persist or are challenging to diagnose and resolve, consult a professional transmission specialist or mechanic with experience in diagnosing and repairing transmission issues. They can use specialized diagnostic tools to pinpoint the problem accurately.
Addressing transmission problems promptly is crucial to prevent further damage and ensure safe and reliable vehicle operation. Proper diagnosis and repairs are essential to maintain transmission performance.
Vibration or Rough Idling
Vibration or rough idling can be an unexpected and unsettling issue that arises after an engine replacement, affecting not only the comfort of the vehicle but also its overall performance. Following the installation of a new or rebuilt engine, experiencing vibrations or erratic idling can be disconcerting.
Experiencing vibration or rough idling as one of the common problems after engine replacement can occur due to several factors, including:
- Misaligned Components: During the engine replacement process, various components such as engine mounts, exhaust system parts, or transmission mounts may not have been properly aligned or connected.
- Improperly Balanced Parts: Rotating parts, such as the crankshaft, flywheel, or harmonic balancer, may not have been properly balanced during the engine assembly process or after installation.
- Engine Mount Issues: Damaged or incorrectly installed engine mounts can lead to excessive engine movement and vibrations.
- Vacuum Leaks: Vacuum leaks in the intake system can disrupt the air-fuel mixture, resulting in poor idling and vibrations.
- Fuel System Problems: Issues with fuel delivery, such as clogged fuel injectors or a malfunctioning fuel pressure regulator, can affect engine performance at idle.
Possible Solutions
- Visual Inspection: Conduct a visual inspection of the engine bay and surrounding areas to check for loose or misaligned components. Look for disconnected hoses, loose bolts, or exhaust parts that may not be properly aligned.
- Engine Mount Inspection: Inspect the engine mounts for damage or improper installation. Damaged or worn engine mounts should be replaced. Ensure that the engine is properly secured and isolated from the vehicle’s chassis.
- Balance Rotating Components: If you suspect that improperly balanced rotating components are causing the vibrations, have a professional mechanic or machine shop balance the crankshaft, flywheel, and other relevant parts.
- Vacuum Leak Detection: Use a smoke test or a can of carburetor cleaner to check for vacuum leaks in the intake system. Address any leaks by replacing damaged hoses or gaskets and ensuring all connections are secure.
- Fuel System Inspection: Inspect the fuel system for problems such as clogged fuel injectors, a malfunctioning fuel pressure regulator, or a dirty fuel filter. Clean or replace components as needed.
- Throttle Body Cleaning: Clean the throttle body and idle air control valve to ensure proper airflow and idle control. Use throttle body cleaner and follow the manufacturer’s instructions.
- Engine Control Module (ECM) Reset: If necessary, reset the ECM by disconnecting the battery for a few minutes. This can help the ECM relearn its idle parameters.
- Professional Diagnosis: If the vibration or rough idling persists or if you cannot identify the cause, consult a professional mechanic or automotive technician. They can use specialized diagnostic tools to pinpoint and resolve the issue accurately.
- Alignment and Balance: Ensure that all engine and transmission components are properly aligned and balanced during the installation process. Follow manufacturer specifications and guidelines to achieve correct alignment and balance.
Note
Addressing vibration or rough idling issues is essential for engine performance and overall vehicle comfort. Proper diagnosis and timely repairs are crucial to eliminate these problems and ensure a smooth and reliable engine operation.
Fuel System Problems
Fuel system problems can be a perplexing and performance-impacting issue that emerges after an engine replacement, affecting a vehicle’s ability to deliver the right amount of fuel for combustion. Following the installation of a new or rebuilt engine, issues related to the fuel system, such as poor fuel delivery, irregular idling, or diminished power, can be a source of frustration.
Experiencing fuel system issues as one of the common problems after engine replacement can occur due to various reasons, including:
- Fuel Line Issues: During the engine replacement process, fuel lines or hoses may have been damaged, disconnected, or improperly reconnected, leading to fuel delivery problems.
- Clogged Fuel System: Debris or contaminants in the fuel system, such as a clogged fuel filter, can restrict fuel flow and affect engine performance.
- Malfunctioning Fuel Injectors: Fuel injectors can become clogged, stuck open, or stuck closed during the engine replacement process or due to age and wear, affecting the air-fuel mixture.
- Fuel Pressure Problems: A malfunctioning fuel pressure regulator or fuel pump can result in inadequate fuel pressure, causing engine running issues.
- Electrical Issues: Problems with the fuel system’s electrical components, such as the fuel pump relay or wiring harness, can disrupt fuel delivery and lead to poor engine performance.
Possible Solutions
- Visual Inspection: Inspect the fuel lines, hoses, and connections in the engine bay for damage or disconnections. Repair or replace any damaged components and ensure all connections are secure.
- Fuel Filter Replacement: If you suspect a clogged fuel filter, replace it with a new one. Regularly changing the fuel filter is part of routine maintenance and can prevent fuel flow problems.
- Fuel Injector Cleaning or Replacement: If you suspect issues with the fuel injectors, consider cleaning them using a fuel injector cleaner. In severe cases, replace malfunctioning injectors.
- Fuel Pressure Testing: Use a fuel pressure gauge to test the fuel system’s pressure at the fuel rail. Compare the readings to the manufacturer’s specifications. A low-pressure reading may indicate a problem with the fuel pump or pressure regulator.
- Check Fuel Pump Operation: Listen for the fuel pump priming sound when turning the ignition key to the “ON” position. If you don’t hear the pump, it may be malfunctioning. Test the fuel pump relay and related wiring to ensure proper electrical supply to the pump.
- Fuel System Cleaning: Consider using a fuel system cleaner to remove deposits and contaminants from the fuel system. Follow the product’s instructions for proper usage.
- Electrical Component Inspection: Inspect the electrical components related to the fuel system, such as the fuel pump relay, wiring, and connectors, for damage or loose connections. Repair or replace any problematic components.
More Solutions
- Fuel Quality: Ensure that the fuel being used is of good quality and free from contaminants. Poor-quality or contaminated fuel can lead to fuel system problems.
- Reset the Engine Control Module (ECM): If you make significant repairs or changes to the fuel system, reset the ECM by disconnecting the battery for a few minutes. Reconnect the battery, start the engine, and allow it to relearn its fuel-related parameters.
- Professional Inspection: If fuel system problems persist or if you are unable to identify the cause, consult a professional mechanic or automotive technician. They can use specialized diagnostic equipment to pinpoint and resolve the issue accurately.
Note
Addressing fuel system problems promptly is essential to ensure proper fuel delivery and engine performance. Proper diagnosis and repairs are crucial to maintain the vehicle’s drivability and efficiency.
FAQs
How Long Will a Car Last After Engine Replacement?
The longevity of a car after an engine replacement depends on several factors, including the quality of the replacement engine, the vehicle’s overall condition, and how well it’s maintained afterward.
A properly installed and well-maintained engine replacement can potentially allow a car to last for many more years, often matching or even exceeding its original lifespan.
Routine maintenance, timely repairs, and careful driving play critical roles in extending a car’s life after an engine replacement.
Additionally, using high-quality replacement parts and following recommended maintenance schedules can contribute significantly to the car’s long-term durability.
What Should I Look for After Replacing My Engine?
After replacing your engine, it’s crucial to conduct a thorough post-installation inspection. Start by checking for any leaks, including oil, coolant, and fuel.
Monitor the engine’s performance, looking for issues like poor acceleration, rough idling, or unusual noises. Ensure all electrical components, including sensors and wiring, are properly connected and functioning.
Keep an eye on the Check Engine Light (CEL) for any diagnostic trouble codes (DTCs). Finally, follow recommended break-in procedures if applicable to allow the new engine to settle in properly.
Regularly scheduled maintenance and monitoring for any signs of trouble will help ensure the longevity and performance of your newly replaced engine.
What Happens When You Replace a Car Engine?
When you replace a car engine, the existing or damaged engine is removed from the vehicle, and a new or rebuilt engine is installed in its place. This process involves disconnecting various components, including the exhaust, wiring, and hoses, to remove the old engine.
The replacement engine is then carefully aligned, connected to the transmission, and secured in the engine bay. Once the new engine is in place, it undergoes testing and calibration to ensure proper functionality.
This process can significantly improve the vehicle’s performance, efficiency, and reliability, breathing new life into the car and extending its usable lifespan.
Proper installation and post-replacement maintenance are essential to ensure the success of the engine replacement project.
How Long Does It Take for a New Engine to Settle?
The time it takes for a new engine to settle or break in typically varies depending on factors such as the engine type, manufacturer recommendations, and driving conditions.
Generally, it’s advisable to observe a break-in period of around 500 to 1,000 miles (804 to 1,609 kilometers) for most modern engines.
During this period, it’s essential to avoid sustained high speeds, sudden accelerations, or heavy loads to allow the engine components to wear in and seat properly.
Regular oil changes and adherence to the manufacturer’s guidelines are crucial during this phase to ensure optimal engine performance and longevity.
However, specific recommendations can vary, so it’s advisable to consult the owner’s manual or the engine manufacturer for precise break-in instructions for your particular engine.
Is It OK to Buy a Car with a Replaced Engine?
Buying a car with a replaced engine can be perfectly acceptable, provided that certain conditions are met. First and foremost, it’s essential to have confidence in the quality of the replacement engine and the competence of the installer.
Thoroughly inspect the vehicle’s maintenance records, service history, and any documentation related to the engine replacement to ensure it was done professionally and with quality components.
Additionally, consider having a trusted mechanic perform a pre-purchase inspection. This helps to assess the overall condition of the car, including the replaced engine.
If everything checks out, a car with a replaced engine can offer reliability and performance akin to a new or rebuilt engine. This potentially provides years of dependable service.
Does Replacing an Engine Devalue the Car?
Replacing an engine can have varying effects on a car’s value, and it largely depends on several factors. In some cases, a well-documented and professionally executed engine replacement can enhance a car’s value because it extends the vehicle’s usable life and performance.
However, in other situations, especially if the engine replacement is poorly documented or the car has other significant issues, it might lead to a depreciation in value.
Potential buyers may be concerned about the reason for the engine replacement and the overall condition of the vehicle.
Proper documentation, maintenance records, and transparency about the engine replacement can help mitigate any potential devaluation and instill confidence in potential buyers.
Does the Miles Reset with a New Engine?
No, the miles on a car’s odometer do not reset when a new engine is installed. The odometer records the total distance the vehicle has traveled throughout its lifetime and is not linked to the engine.
When a new engine is installed, the odometer will continue to reflect the total mileage accumulated by the chassis or the vehicle as a whole.
This is an important aspect of maintaining transparency and accurately representing the vehicle’s overall wear and usage to potential buyers or when assessing its value.
How Do You Drive a New Car Engine?
When driving a new car engine, it’s essential to follow the manufacturer’s guidelines and recommendations for the initial break-in or settling period. This is typically the first 500 to 1,000 miles.
During this time, avoid excessive acceleration, high speeds, or heavy loads. These can put undue stress on the engine components that are still “breaking in.” Opt for gentle acceleration and deceleration, vary your speed, and avoid prolonged idling.
Regularly change the engine oil as recommended, as fresh oil helps protect the engine during this critical phase.
Once the break-in period is complete, you can gradually introduce more varied driving conditions and performance-oriented driving while continuing to adhere to the manufacturer’s maintenance schedule for long-term engine health and durability.
What Is the Difference Between Engine Replacement and Engine Rebuild?
The key difference between engine replacement and engine rebuild lies in the extent of the work done on the existing engine. In an engine replacement, the old engine is entirely removed from the vehicle, and a new or rebuilt engine is installed in its place.
This is a complete swap, often done when the original engine is severely damaged or beyond repair. Conversely, in an engine rebuild, the existing engine is disassembled, and its individual components are inspected, repaired, or replaced as needed to restore it to a functional state.
This process can involve machining and refurbishing various parts. Engine rebuilds are typically chosen when the engine’s core structure is still sound, and it’s a cost-effective way to extend its life and improve performance without the need for a completely new engine.
When Should You Replace Your Engine?
You should consider replacing your engine when it becomes impractical or uneconomical to repair your current engine.
Common reasons include severe engine damage due to issues like a cracked block or cylinder head, extensive internal component wear, or if the cost of repairs significantly exceeds the vehicle’s value.
Additionally, engine replacement might be warranted if you desire improved performance and fuel efficiency. Or if the current engine is outdated or no longer meets emissions requirements.
It’s essential to assess the overall condition of your vehicle and weigh repair costs against the benefits of replacement. Additionally, consult with a trusted mechanic to make an informed decision on when to replace your engine.
What are the Disadvantages of Changing a Car Engine?
Changing a car engine, while beneficial in many cases, comes with some disadvantages. First and foremost, it can be a costly endeavor, as engines themselves are expensive. Additionally, the labor involved in the replacement process can add to the overall expense.
It may also take a significant amount of time, leaving your vehicle out of commission during the replacement. Additionally, engine replacements can sometimes result in unforeseen issues or complications. These include; misalignment or compatibility problems with other vehicle components.
Lastly, there is a potential risk that the replacement engine may not perform as expected or may have its own set of problems. This is especially if not properly vetted or if the quality of the replacement engine is subpar.
The Conclusion
In conclusion, navigating the common problems after engine replacement is an essential part of ensuring the success and longevity of this significant automotive endeavor.
From poor engine performance and mysterious warning lights to oil leaks and transmission issues, understanding and addressing these common problems after engine replacement is pivotal.
Whether you’re a skilled mechanic striving for precision in your work or a vehicle owner seeking a reliable and powerful ride, this knowledge equips you to diagnose, resolve, and enjoy the full potential of your newly replaced engine.
By addressing these common problems after engine replacement promptly and effectively, you can embark on a journey of improved performance, reliability, and confidence in your vehicle’s renewed vitality.

Hi, I’m Maurice Nyangano. A certified auto expert who has been in the business for over fifteen years and has worked as a service writer for five years. I take great satisfaction in providing factual information in my buyer’s guides, comparisons, expert repair guides, and car reviews. I write automotive blogs to assist fellow auto experts and car owners in troubleshooting various car issues and offering fixes.